You can use the following tools during AutoTRASSIR configuration:
- Expected license plate size - The estimated area of the image that will be used to determine the license plate size for license plate detection.
- Detection zones - the areas on the image where the license plates will be detected.
To configure AutoTRASSIR, follow these steps:
-
Depending on the scene, select the desired value in the Lanes number dropdown list. The corresponding number of Lane zones will appear on the screen.
Tip
Select the number of the lanes based upon the actual roadway width, picking out the closest available value. The standard commonly accepted lane width is 3,5 meters. If the camera captures the roadway width which is 8 meters (that is not only the roadway width, but also the actual image width in meters). The closest to 8 meters should be selected in this case, which is "2 lanes".
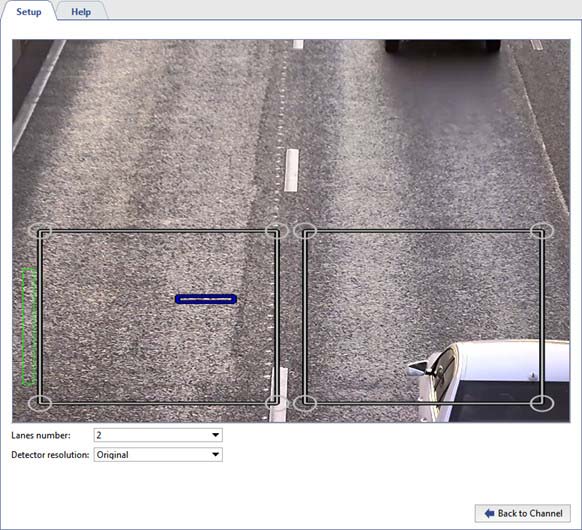
In the Detector resolution, leave the default value - Original!
Tip
At this stage of the configuration it is not necessary to precisely determine the dimensions of the recognition zones. The recognition zones will be configured in step 6.
-
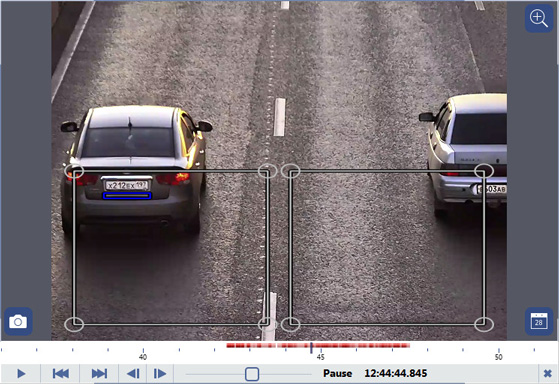
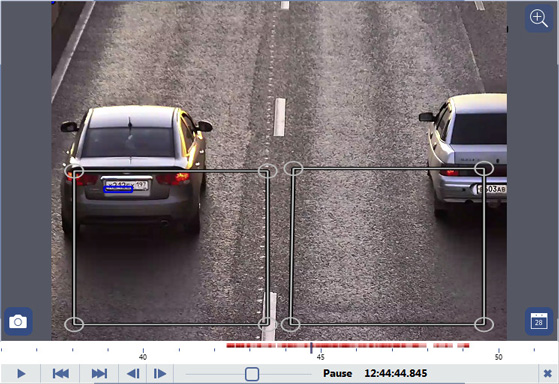
Compare the expected license plate size (you can freely move the icon around the screen) with the actual image of a license plate in the frame. For convenience, the comparison may be made in archive viewing mode after selecting the best frame of a passing vehicle.
If the actual size of the license plate on the image does not significantly differ from the expected license plate size, then the focal distance of the camera's lens must be changed. In this manner you can increase or decrease the size of the vehicle in the frame. If adjusting the focal distance is insufficient, then try changing the camera's angle or its installation height \ location.
-
If the actual license plate size in the image is much larger than the expected license plate size, then use the Detector resolution settings.
In the Detector resolution dropdown list, select Preset. The picture's resolution will be reduced in the best way possible, with minimal loss of quality and minimal additional load on the server's CPU.
Tip
This situation may occur if a high-resolution camera is used to monitor a very narrow section of road. For example, if a 3-MP camera is used to monitor a single lane. Note that in this case the expected license plate size depends on the value of the Lanes number parameter.
-
During the comparison, if the actual size of the license plate on the image is much smaller than the expected license plate size and adjusting the focal distance and changing the camera's angle and/or installation location does not fix this, the resolution of the camera used for license plate recognition may be insufficient for the given scene.
-
If a complete match between the actual license plate size and the expected license plate size could not be achieved in the previous configuration steps, you can specify the expected license plate size manually. To do this, in the Detector resolution setting, select Custom (Specify Plate Area).
To do this, on the selected archive frame change the expected license plate size so that it precisely matches the license plate's actual image.
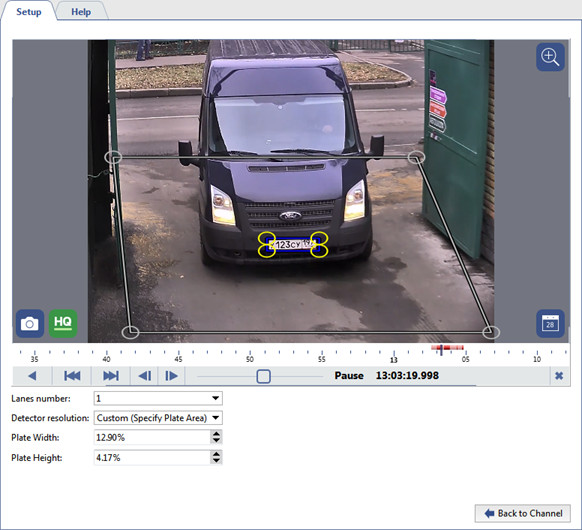
Warning
Using the Custom (Specify Plate Area) parameter increases the load on the server's CPU. Moreover, reducing the image to an arbitrary size may introduce compression artifacts, which negatively affect license plate number recognition quality. Use this setting only if the other options did not help.
-
The final stage of configuring AutoTRASSIR requires defining the recognition zones' precise boundaries. Assigning distinct zones makes it possible to:
- associate a vehicle's passing with a specific lane (monitoring selected lanes for fixed-route vehicles, detecting vehicles passing on a walkway, etc.);
- save server resources by analyzing only the truly interesting and relevant areas of the image, minimizing the number of false activations of the detector.
For example:
-
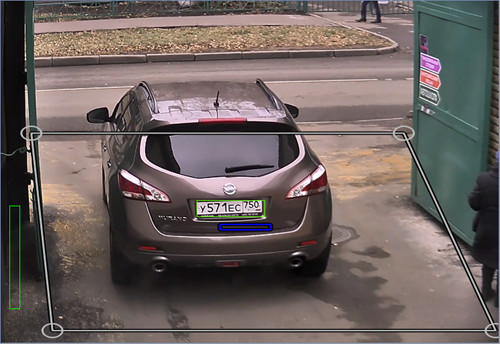
To recognize the license plates of vehicles entering and exiting through a gate, you can assign only the area with the gate. In doing so, vehicles passing by on the road will be ignored.
-
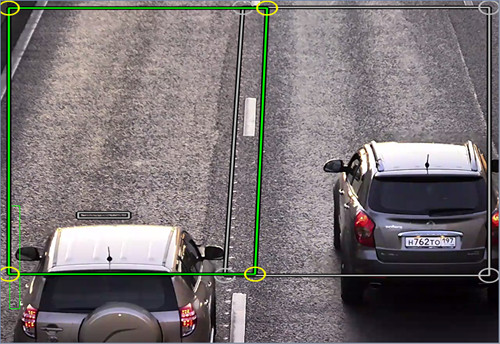
You should draw a separate zone on each lane of the multilane roadways.
-
In this example the camera has been installed so that the depth of field (the area of the image with the best image quality) covers only a small area in the middle of the frame. This is the same area that is relevant and useful for license plate recognition. There is no point in performing license plate recognition where the license plate is blurry or isn't visible. Limit the recognition zone to the area where the license plate is clear and of the required size.
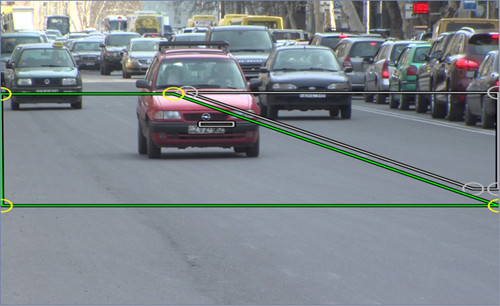
Warning
Upon setting the depth of field and assigning recognition zones, it should be born in mind how many frames the camera will be able to capture in the time period the vehicle passes through the zone. The number of frames the camera takes depends directly on the vehicle's speed. Additionally, note that not all frames are recognizable. The license plate image must be clear and distinguish. In most cases, capturing 4-5 viable frames is sufficient.
You can verify the settings by showing AutoTRASSIR figures. To do this, right-click on the frame and select View Options... in the context menu. Set the Show figures checkbox and select AutoTRASSIR Detector in the dropdown list.
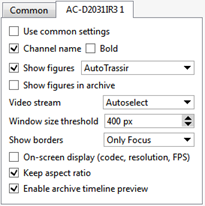
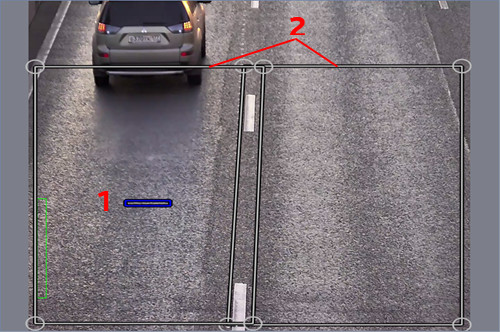
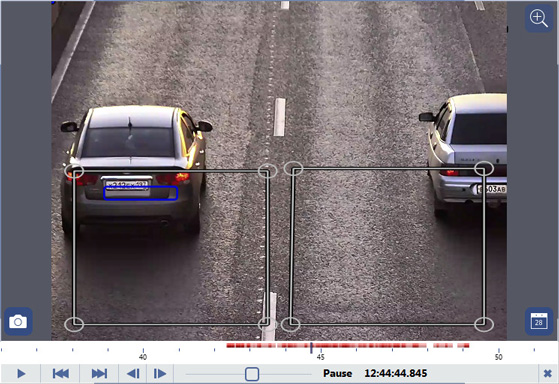
The AutoTRASSIR figures will be displayed on the screen:
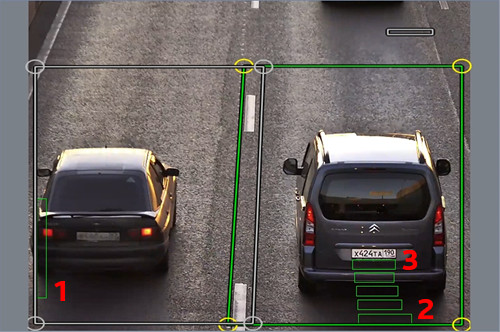
- Processing queue - This indicator reflects the state of the queue for processing license plate numbers. If the vertical bar fills up and turns red, then AutoTRASSIR begins to drop frames. The processing queue will fill if the server's CPU is heavily loaded and unable to process the frames.
- Frame recognition quality - This indicator, in the form of a stripe, displays the actual size of the license plate and its recognition quality. Each stripe pertains to a separate frame used for license plate number recognition. Depending on whether or not the frame was suitable for recognition, the color of the stripe will change from green (a "good" frame) to red (a "bad" frame).
- Expected license plate size - This blue indicator represents the expected size of a license plate. The vertical green stripes show the actual size of the license plate in the frame.
