To activate the plugin go to the Channel settings to the Software detectors area, select Neuro detector and then select the Server which will calculate the analytics.
Tip
In case the module is activated on the NeuroStation,video recorder, in the Server settings select the locally value. Otherwise select NeuroStation server name.

Tip
The Search for detections link opens the window of object search in the archive. You can read more about this feature in the Operator's Guide (ActiveSearch - search for objects in the archive).
Click Setup detector link to open the detector's settings.
Tip
Enable showing the People/Object detector figure on the channel before configuring the detector settings and to track the changes in the detector's operation (read more in Camera window interface settings).
Detector
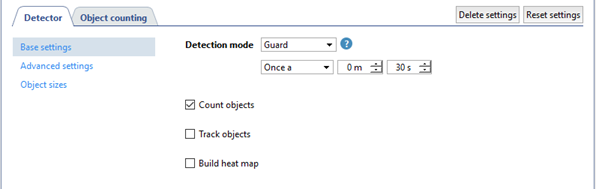
Select Detection mode in the base settings and set up the detection period, depending on the detected objects requirements:
-
Guard. This mode suits best for outdoor scenes with a decent amount of detected objects. It is designed for vehicle, people, animals and birds detection.
-
Universal. This mode is designed for outdoor as well as indoor scenes. In this mode the detector detects people, vehicles and bicycles.
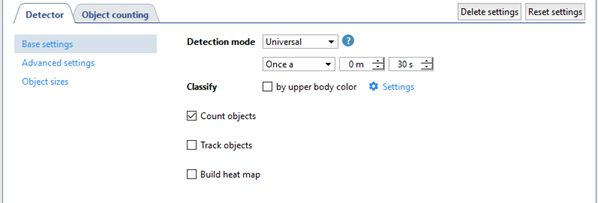
If you need to identify people wearing the same color of clothing among all detected objects on video, set the by upper body color flag and press Settings to choose the required classes.
Tip
To create classes which will be used by the detector, go to the Server settings -> Plugins -> Neuro detector.
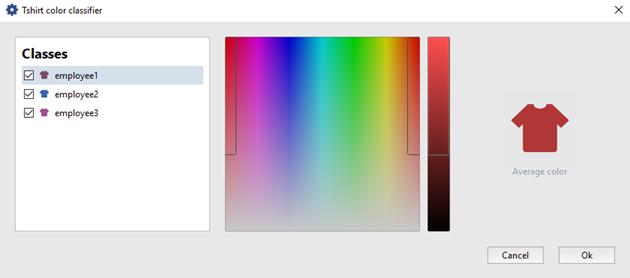
Read more about creating classes in Classifier.
-
Head detector is designed for detecting people in crowded scenes.
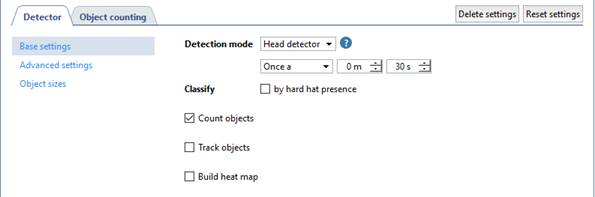
Set the by hard hat presence flag to highlight by different colors people wearing and not wearing hard hat.
-
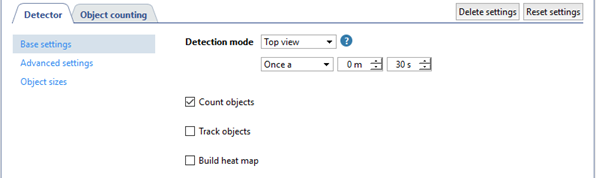
The Top view detects people the same as the Head detector. It is designed for scenes with complex angles (i.e. when a camera shots from above or installed at the 75 degree or greater angle).
Tip
Use this mode only in case there is no option of installing video cameras according to our recommendations.
-
The Face mask detector identifies the faces of people wearing face masks and highlights people with and without the masks by different colors on the image.
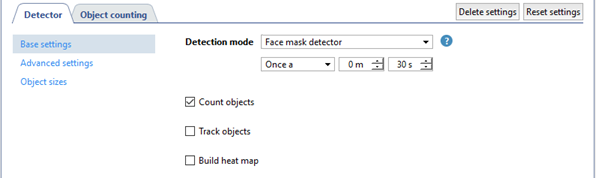
The below listed flags enable displaying of the following information on video:
- Count objects - the amount of objects, detected in the zone, or objects crossed the specified boundary;
- Track objects - the motion track of the detected objects;
-
Build heat map enables the heat map building.
Tip
You need to additionally Calibrate the floor and add the ground plane on map to build the object heat map.
Important
The operation of the detector depends on the Mode selected in the analytics server settings:
- The Count objects and Track objects features will operate when the following mode are selected Default, Neuro detector and Classifier.
- The Classify by upper body color and Classify by hard hat presence work only in the Classifier mode.
Read more about analytics server settings and its operation mode in the Analytics.
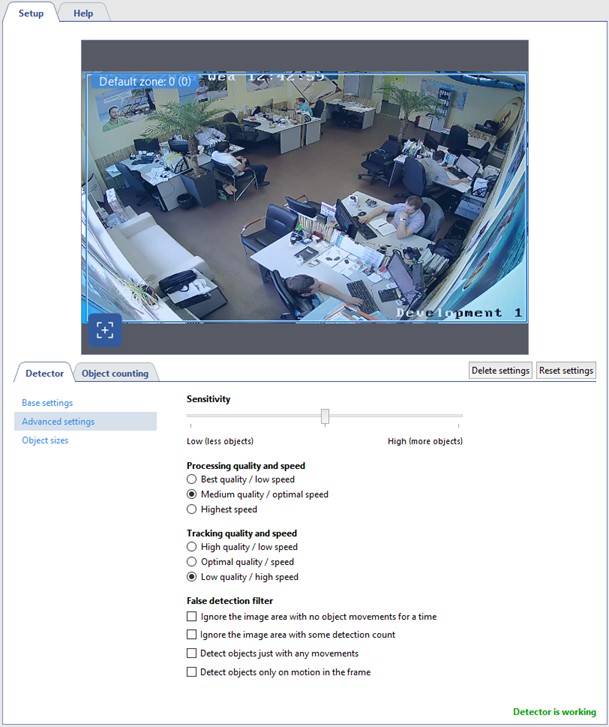
The Advanced settings are meant for determining speed and quality indicators of neuro detector operation.
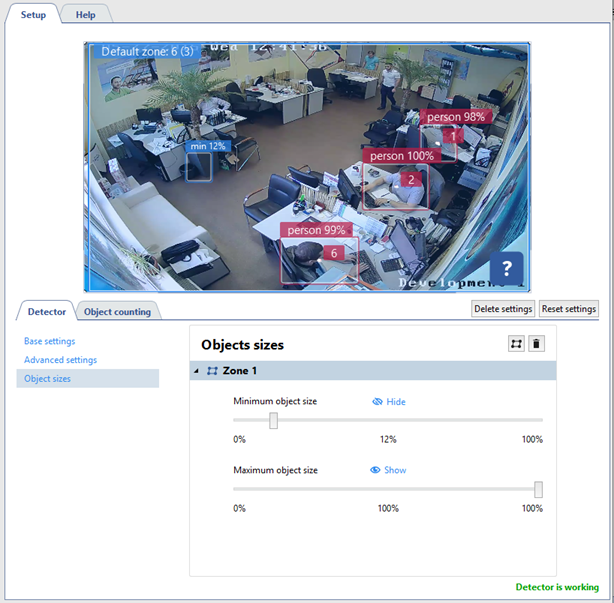
The Object sizes option lets you create zones in which the objects will be detected. Using Minimum object size and Maximum object size settings select the largest and the smallest sizes of the detected objects. Bear in mind the sizes of the detected objects (human height, vehicle size or size of a person riding a bicycle) when choosing sizes.
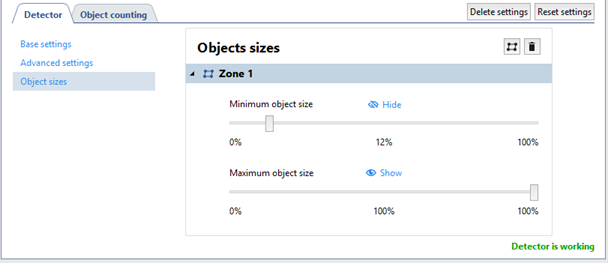
If the detector is unable to detect an object in any image area, you should set another zone with the other size range for this area.
Warning
Do not create new object detection zones if it is not necessary, because each new zone increases the server load.
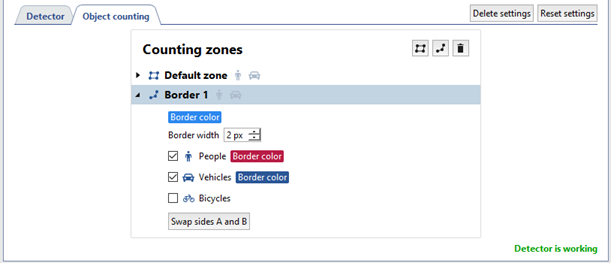
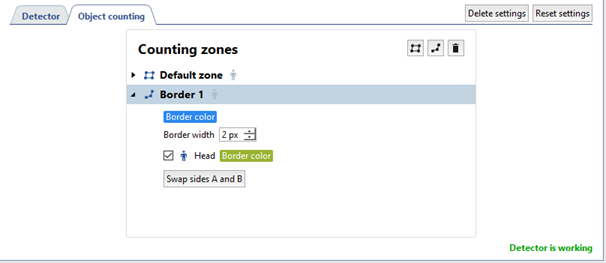
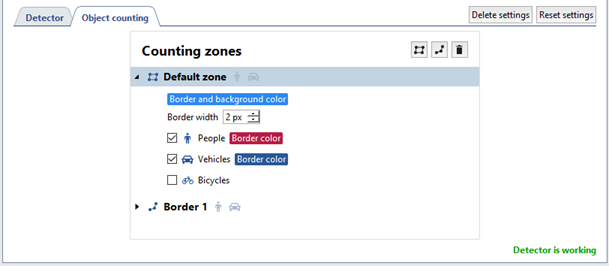
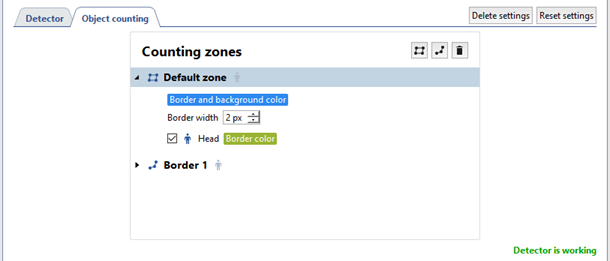
Object counting
The Object counting tab lets you create zones and boundaries for counting the amount of the detected objects. There is already a default zone, created by the detector, which occupies the entire image area.
To create a new counting zone press  and set its vertices. To finish drawing, left click or press CTRL+ENTER at the zone starting point.
The counting zone setup depends on the detected object type:
To create a border, press  and set its location points on the image. To finish drawing the border, left-click or CTRL+ENTER at the zone starting point.
The counting border setup depends on the detected object: