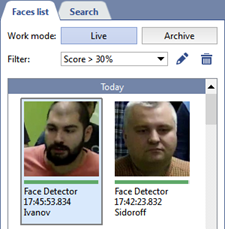
Displays all the faces detected on the video in the Face Recognizer Log on the List tab.
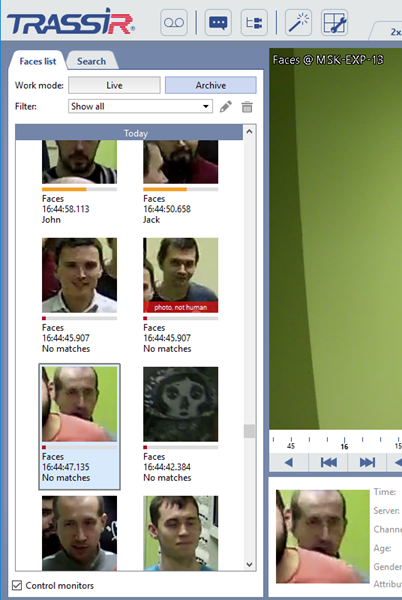
Face display is made in Live and Archive modes. The first displays the recognized faces in real time, and when you enable the second, the auto-update of the face recognition log is disabled. The log entry consists of:
- the most recognized face;
- indicator - the degree of coincidence of the recognized face with a person from the database;
- channel name;
- face detection time;
- person's name.
When selecting a face in the journal, the channel archive where this person got caught in the camera lens will open. To disable this feature, clear the Control monitors flag.
A large number of faces in the log can make the work of the operator more difficult. If there is no need to respond to all people appearing in the frame, then reduce the number of displayed faces by using a filter. For example, configure the filter so that the log will display only people whose faces are in the Faces database.
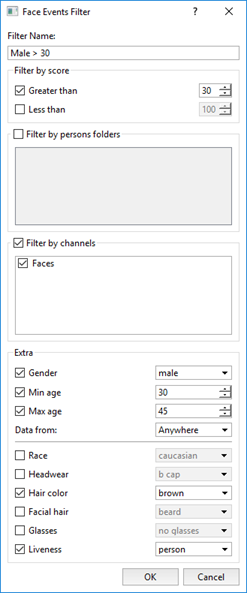
To create a new filter, you must:
-
On the Log tab in the Filter drop-down list, select add new....
-
Specify filter parameters in the window opened:
- Filter Name - the name of the filter under which it will be saved in the system.
- Filter by score - show faces of people Greater than and Less than similar to the people from Faces database.
- Filter by persons folders - - show faces from a specific Persons folder.
- Filter by channels - show the faces found on a specific video channel.
-
Extra - show faces of certain age of gender. You can also select which data source should be used by the filter to search for persons on certain age or gender in the Data from list.
Moreover, you can specify the additional filter parameters, such as hair color or headwear. In the Liveness setting you can choose Human or Photo value in order to show or hide photo detection records. You can read more about Liveness parameter in the corresponding chapter of the Administrator's Guide.
-
Click OK. Faces corresponding to the filtering criteria will remain in the log.
After saving the filter, use the following buttons:
 - to edit the current filter;
 - to delete the current filter.
